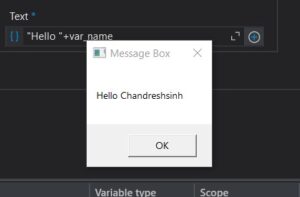
Your Beginner’s Guide to UiPath Studio & Building Your First Automation
What is UiPath Studio?
UiPath Studio is a powerful software designed to streamline your work by automating repetitive tasks across various applications. Imagine automatically logging into programs, copying and pasting data, generating reports, or filling out forms – all without manual intervention! This beginner-friendly guide will introduce you to the core functionalities of UiPath Studio and walk you through building your first automation.
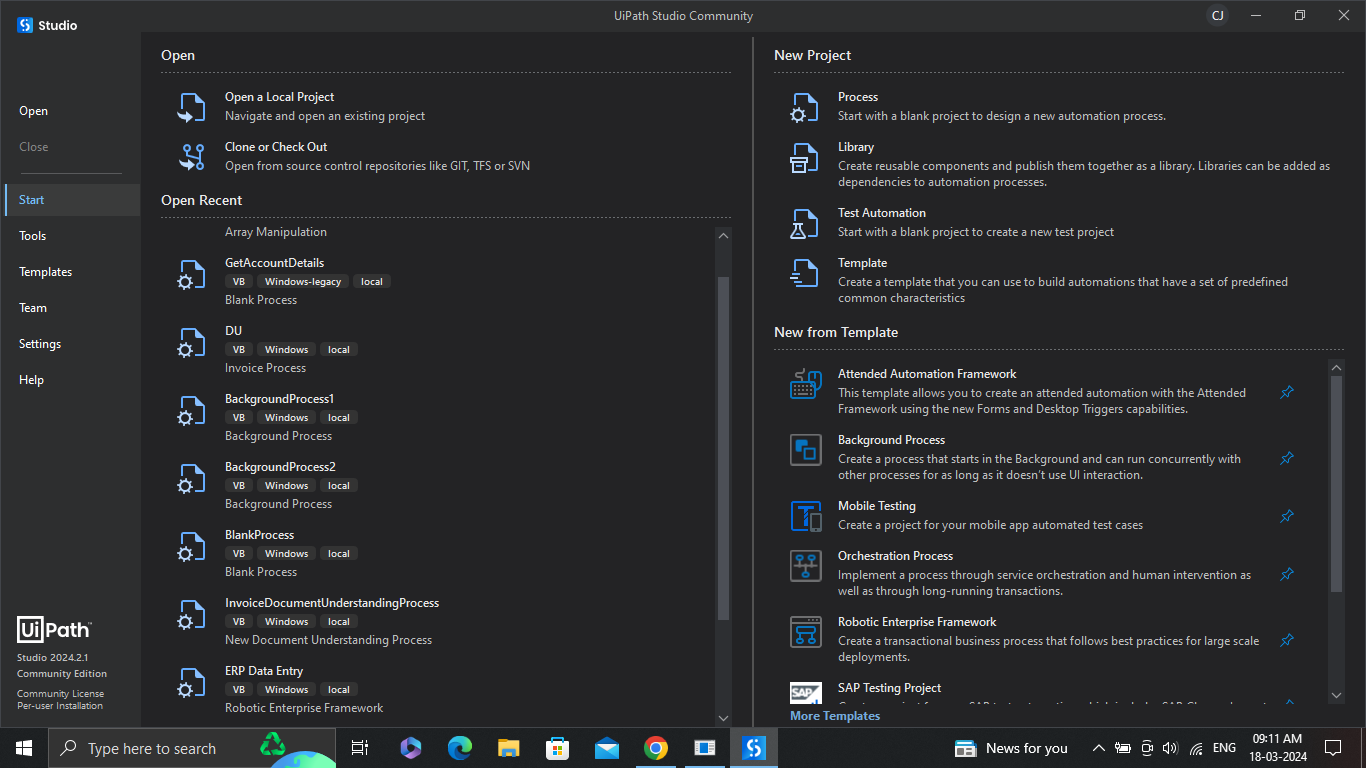
Understanding the UiPath Studio Interface
Upon launching UiPath Studio, you’ll be greeted with a user-friendly interface. Let’s break down the key elements:
- Open – Browse to a local automation project and open it. By default, projects are created in C:\Users\<current_user>\Documents\UiPath.
- Close – Close the automation project that is currently open.
- Start – Create a new automation project or open recently accessed projects. You can create a new project from predefined templates or open a project you recently worked on. Projects can be pinned or removed from the Open Recent list, which displays the description, target framework, language used for expressions, and project source (local, Studio Web, or GIT/SVN/TFS repository) for each project.
- Templates – Create a new project based on a template. In this tab, you can view all available project templates, search and filter them by source. For more information, see Project Templates.
- Team – Manage source control integration for the automation project.
-
Tools – Access tools that enhance your experience with Studio.
- Select the Apps tab for the UI Explorer, Project Dependencies Mass Update Tool, and the Repair Tool for Microsoft Office.
- Select the UiPath Extensions tab to install or uninstall the following extensions: Chrome, Firefox, Edge, Java, Silverlight, Citrix, Windows Remote Desktop, VMware Horizon, Excel Add-in, and SAP Solution Manager.
- Select the Plugins tab to enable or disable source control and test automation plugins.
- Settings – Change the look and feel of Studio, set global preferences, and manage activities package sources. For more information, see Configuring Studio Settings.
- Help – Directs you to product documentation, release notes, online resources, the Community Forum and the RPA Academy.
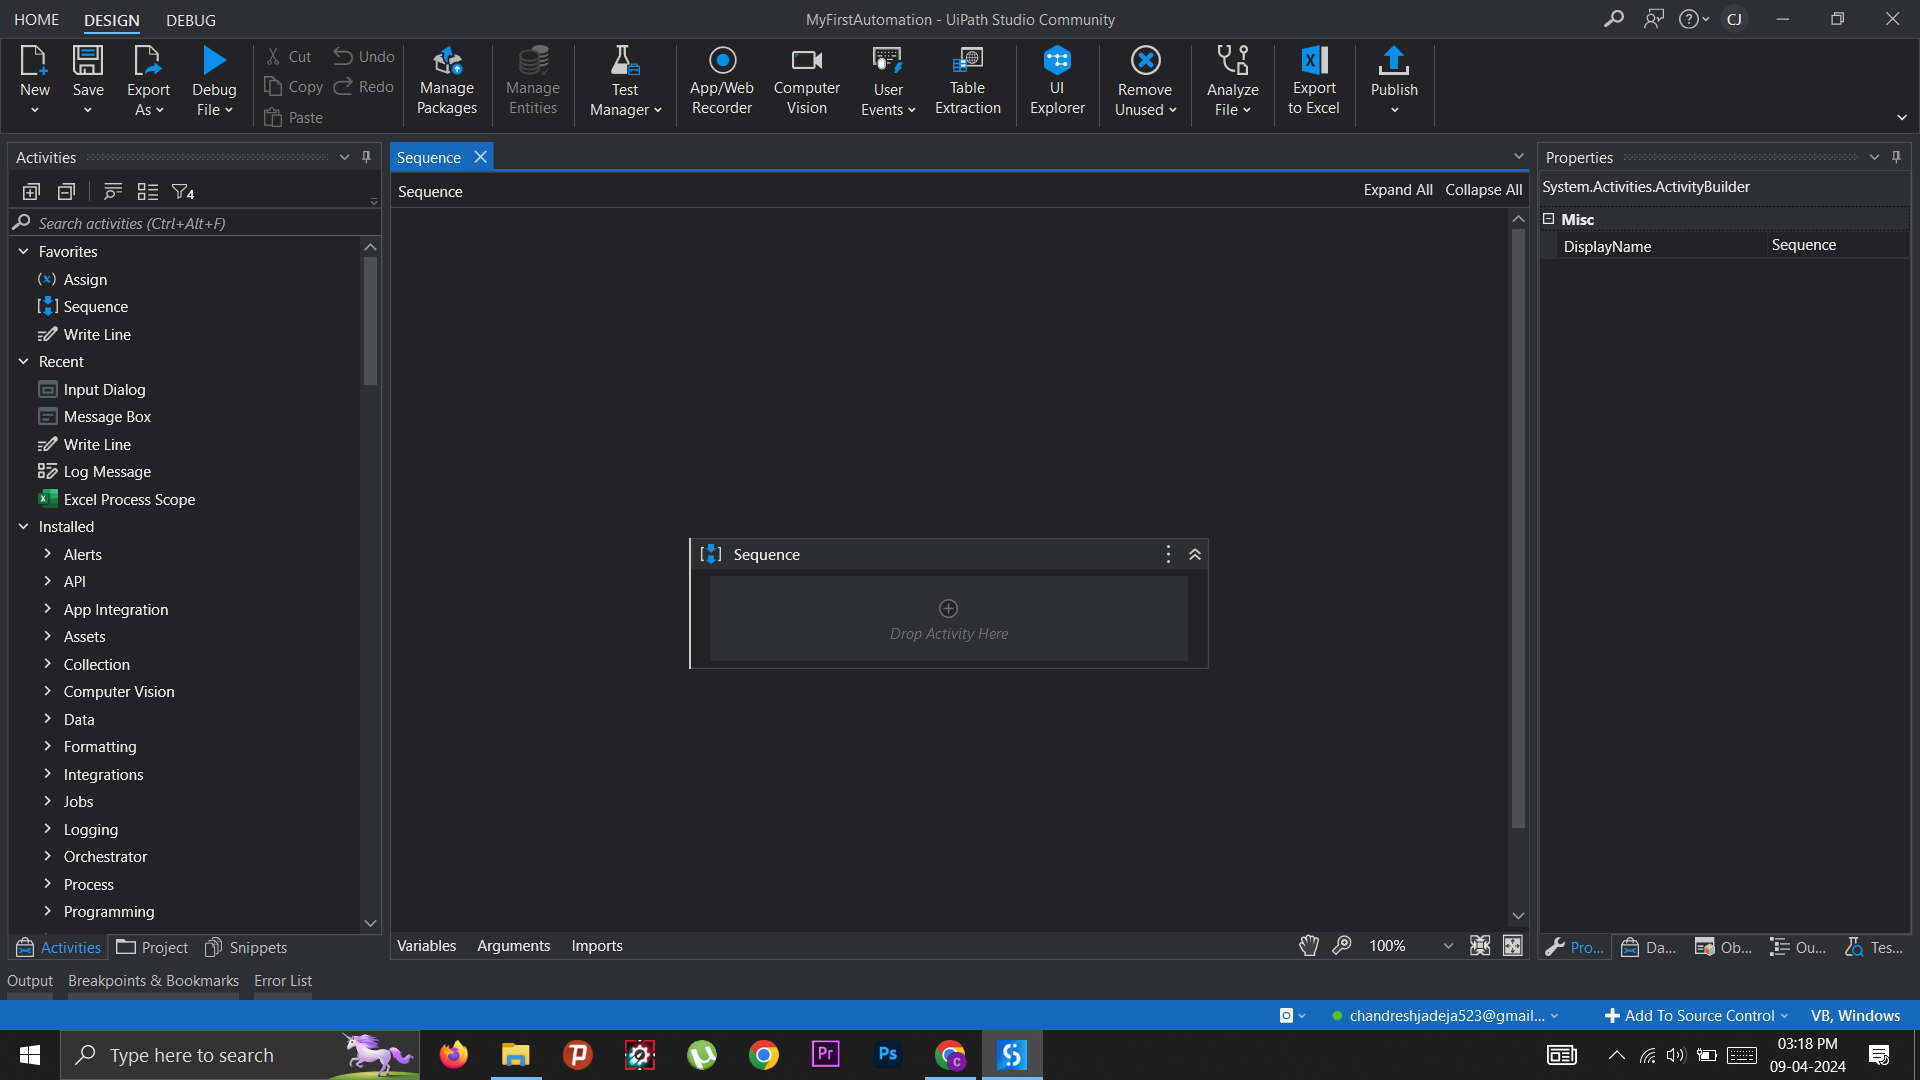
Ribbon Tabs
These tabs provide access to essential functionalities for managing projects, designing automations, debugging workflows, and accessing settings.
- Home: Create and open projects, configure Studio settings, and access help resources.
- Design: Add sequences, flowcharts, and state machines to your project, interact with UI elements, and manage activities.
- Debug: Step through your automation, set breakpoints, monitor execution, and analyze logs.
Panels
These panels offer dedicated workspaces for different aspects of automation development.
- Project Panel: View and manage project files, folders, and dependencies.
- Activities Panel: Explore and add pre-built actions (activities) to your automation.
- Properties Panel: Configure the properties of selected activities within your workflow.
- Output Panel: View execution logs, status information, and errors during automation runs.
- Error List Panel: Identify and address errors flagged by the Workflow Analyzer.
- Breakpoints Panel: Manage breakpoints set within your automation workflow.
Getting Started with Your First Automation
Now, let’s get hands-on and build a simple automation using UiPath Studio! We’ll create a workflow that prompts you for your name and then displays a greeting message.
Let’s use UiPath Studio as an example to walk you through building your first automation. Here’s a simplified Steps:
-
- Search for Activities: In the Activities Panel, search for the “Input Dialog” activity.
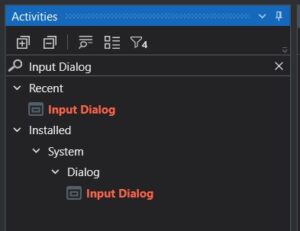
- Build Your Workflow: Drag and drop the “Input Dialog” activity onto the main sequence area of your project. Configure the dialog properties as follows:
Dialog Title: “Input”
Input Label: “Please enter your name”
Input Type: Text Box
Value Entered: Set as a variable namedvar_name(we’ll create this variable in the next step).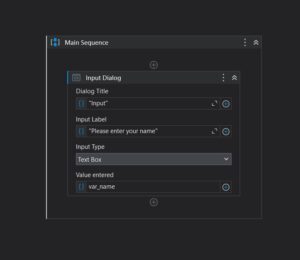
- Create a Variable: Create a new variable named
var_namewith the data type set to String. Add this variable to the “Input Dialog” activity to capture the user’s input.
- Display a Greeting: Drag and drop the “Message Box” activity and configure it to display the message “Hello ” followed by the
var_namevariable.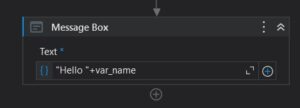
- Search for Activities: In the Activities Panel, search for the “Input Dialog” activity.
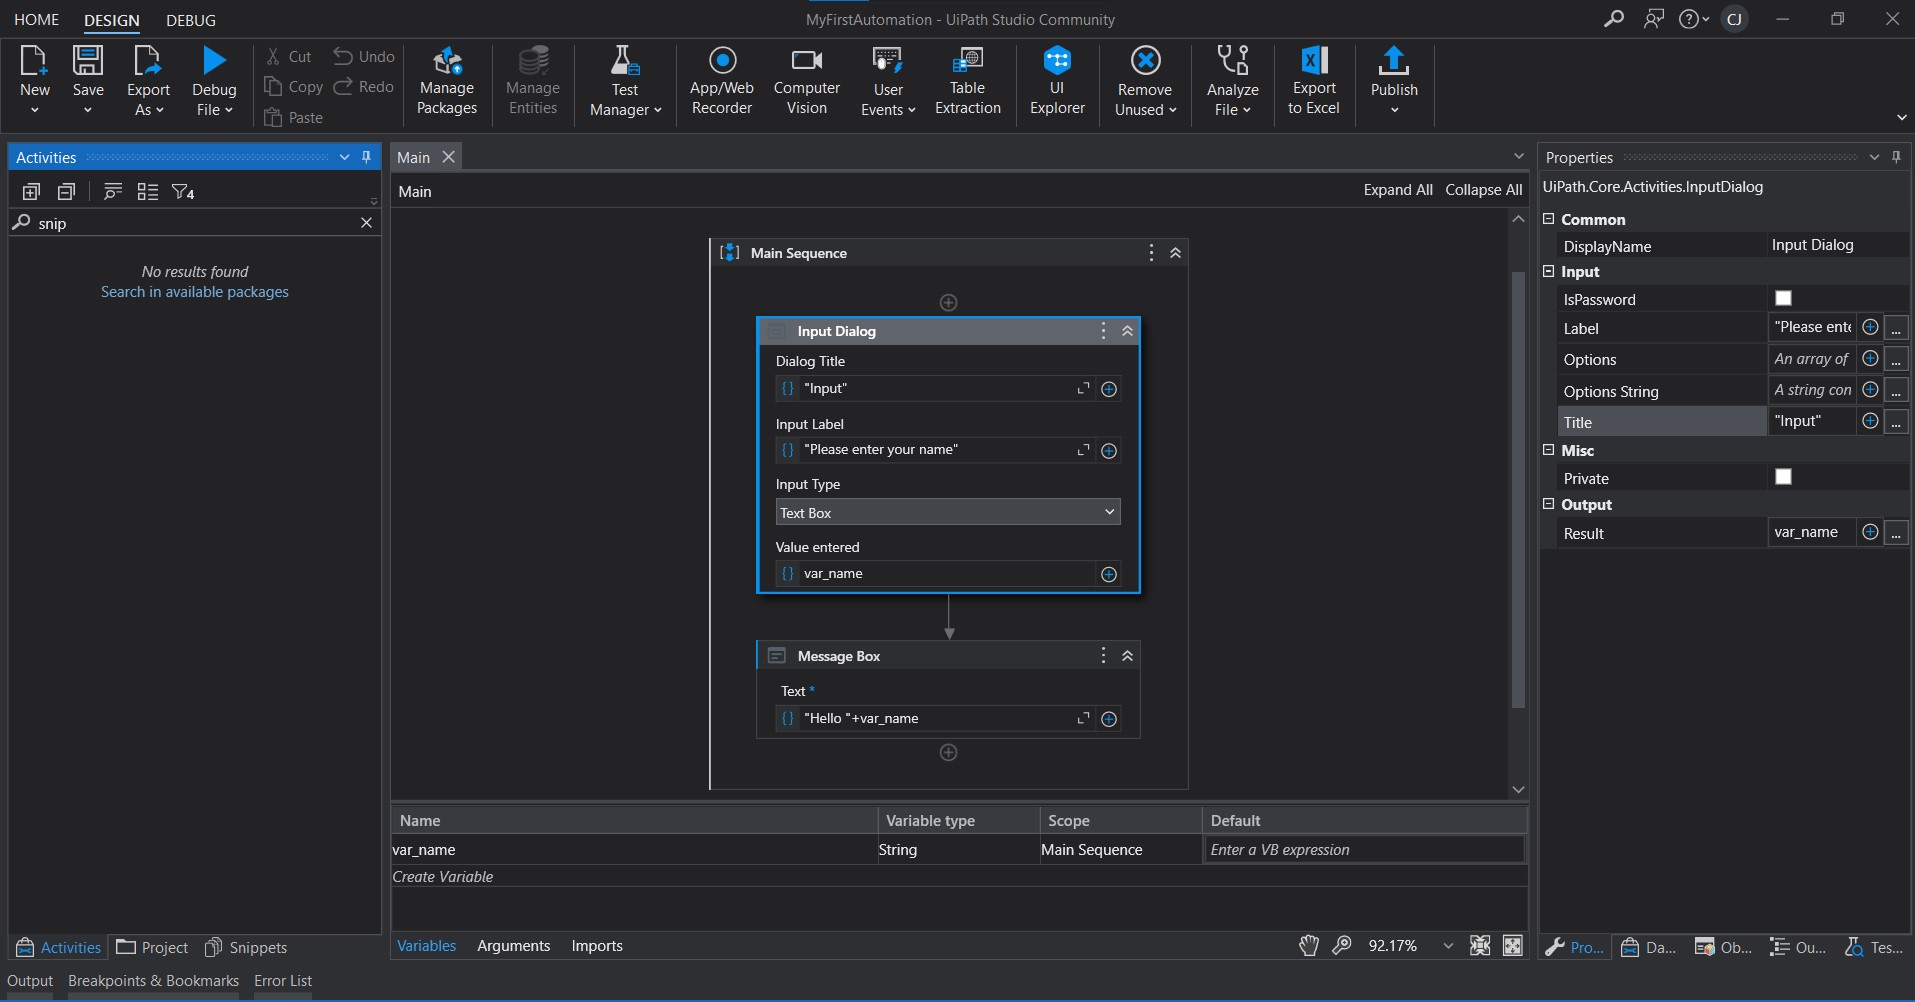
Run Your Automation: Click the “Debug” or “Run” button to execute your workflow. The automation will prompt you to enter your name, and then display a personalized greeting message.
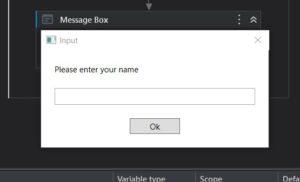
Congratulations! You’ve successfully built your first automation in UiPath Studio!
Exploring Further:
UiPath Studio offers a vast library of activities that can automate a wide range of tasks. Take some time to explore the available activities and experiment with building more complex automations. The “Activities” panel is your gateway to this world of automation possibilities!
Additional Tips:
- Refer to UiPath’s official documentation and online resources for in-depth tutorials and guidance.
- The UiPath Community Forum is a valuable resource where you can connect with other users, ask questions, and share your automation experiences.
With UiPath Studio as your companion, you’re well on your way to automating repetitive tasks and boosting your productivity!

